Tuesday, August 21, 2012

Banana And Raspberry Baby Food

Here is an extra recipe this month for you all!
Today Chloe thought it would be nice to make some baby food for her little brother William, so come see how easy it is to make your own homemade baby food!

Banana And Raspberry Baby Food
Makes around 8 0z. (1 oz. per. cup)


First cut up some yummy fresh banana and place it in a bowl. Chloe is using her knife from her toddler silverware set which works out great! 


Time to mash up those bananas! Chloe is making fast work of it. 


Well it is now break time for Chloe, so she is off to paint while mommy makes the raspberry sauce.


Mommy didn't remember to take pictures of herself making the sauce but here it is all done. All you do is cook down the raspberries in a sauce pan then strain the raspberries so there are no seeds. Ta-Da all finished!


Mix some of the raspberry sauce into the bananas. A little will go a long way!! Mommy froze the rest of the sauce to use in another time maybe making it a little sweet to put on ice cream or mix it in some whipped cream as a yummy light dessert yum yum!


Now it is ready to be put into cups and into the freezer till ready to use. Chloe is only filling each  cup with one ounce so mommy can choose how many ounces she wants to give William.  Make sure the lids are all on tight.

Banana, raspberry, baby food, homemade

All finished and ready for the freezer. It is best to use it with in 1 to 3 months. 
Tips: You can use any combo fruit (or sneak in some veggie) you wish. Chloe also made apple and raspberry as well as peach to go with some fresh bananas. Have fun coming up with different mixes. Chloe is thinking next time we should do carrots and bananas!! What a combo!!

Banana And Raspberry Baby Food
Makes around 8 0z. (1 oz. per. cup)
2 bananas
1/2 pint raspberries (I used a pint so I could have lots extra)

Cut and mash up bananas and set aside.
Place raspberries in sauce pan and mash down while cooking. Cook just till it becomes a sauce that coats the back of a spoon. Remove from heat and strain into a small bowl.
Add raspberry sauce to mashed bananas (about 2 tbsp. more or less) and stir up till well mixed. Place in cup containers and freeze till you want to use it. It is best to use it with in 1 to 3 months.
Tips: You can use any combo fruit (or sneak in some veggie) you wish. Have fun coming up with different mixes.

Wednesday, August 1, 2012

Buttermilk Biscuits

Hello again! Welcome to another installment of Little Chloe Cooks! My mommy said we needed to use up the buttermilk so here is a tasty buttermilk biscuit recipe. It is so easy and can be made really quick!

Southern Buttermilk Biscuits
Whole recipe at bottom
Yield: 10 biscuits


Lets get to it...
First thing this recipe needs is a smile and Chloe is full of them!
Preheat your oven to 450


Ingredients: Clockwise starting with the measuring cup, buttermilk, flour, butter, salt/baking soda and baking powder.


Combine the dry ingredients in the bowl of a food processor. What a professional!


Pulse twice to combine. 


Add butter to food processor. Chloe already wanted to taste, not yet Chloe silly girl.


Pulse a few times until consistency is achieved. It should resemble course meal and there will be small pieces of butter through out. Chloe Says it should look like above.


Add the buttermilk and mix just until combined. If it appears on the dry side, add a bit more buttermilk. It should be very wet.


 Turn the dough out onto a floured board gently, gently pat (don't roll with a rolling pin, fingers are your friends with this dough) the dough out until it's about 1/2" thick. Fold the dough about 5 times, gently press the dough down to a 1 inch thick.

Tip: The key to real biscuits is not in the ingredients, but in the handling of the dough, so love your dough don't abuse it or it will be tough.


Use a round cutter to cut into rounds.
You can gently knead the scraps together and make a few more, but they will not be anywhere near as good as the first ones.


Place the biscuits on a cookie sheet. If you like soft sides, put them touching each other. If you like crusty sides, put them about 1 inch apart these will not rise as high because the biscuits are put close together. Chloe likes her biscuit sides soft.


Tip: You can make these biscuits, cut them, put them on cookie sheets and freeze them then place into a freezer bag for up to a month. When you want fresh biscuits, simply place them frozen on the cookie sheet and bake at 450°F for about 20 minutes.


Bake for about 10-12 minutes the biscuits will be a beautiful light golden brown on top and bottom. Do not over-bake!


Time to do the dishes while we wait. Mommy washed and Chloe dried. Woohoo team work!


OH! there goes the timer! Quick mommy get them out!

Buttermilk, biscuits, baking

Mmmmmm they look great. Time to taste one to see if they are Chloe approved.


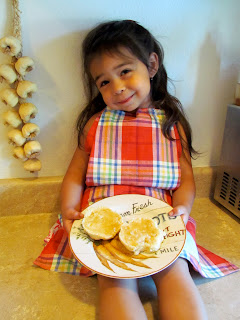
You can have them for breakfast with an egg, cheese, bacon, sausage or Chloe's favorite canadian bacon. Also with butter and jam or jelly but Chloe is not a jam or jelly girl she likes them with honey YUM!


That looks so good, I hope she will give half to mommy.


So with one bite they passed the Chloe test!

Southern Buttermilk Biscuits
Yield: 10 biscuits

Ingredients:

2 cups unbleached all-purpose flour, plus more for dusting the board

1/4 teaspoon baking soda

1 tablespoon baking powder (use one without aluminum)

1 teaspoon kosher salt or 1 teaspoon salt

6 tablespoons unsalted butter, very cold (cut into small chunks)

1 cup buttermilk (more if needed)

Directions:

Preheat your oven to 450°F

Combine the dry ingredients in a bowl, or in the bowl of a food processor. Pulse twice to combine.

Add butter to food processor, pulse a few times until consistency is achieved. It should resemble course meal and there will be small pieces of butter through out.

Add the buttermilk and mix just until combined If it appears on the dry side, add a bit more buttermilk. It should be very wet.

Turn the dough out onto a floured board gently, gently pat (don't roll with a rolling pin) the dough out until it's about 1/2" thick. Fold the dough about 5 times, gently press the dough down to a 1 inch thick.


Use a round cutter to cut into rounds. You can gently knead the scraps together and make a few more, but they will not be anywhere near as good as the first ones.


Place the biscuits on a cookie sheet. If you like soft sides, put them touching each other. If you like crusty sides, put them about 1 inch apart these will not rise as high because the biscuits are put close together.

Bake for about 10-12 minutes the biscuits will be a beautiful light golden brown on top and bottom. Do not over-bake.

Tip: The key to real biscuits is not in the ingredients, but in the handling of the dough.

Tip 2: You can make these biscuits, cut them, put them on cookie sheets and freeze them then place into a freezer bag for up to a month. When you want fresh biscuits, simply place them frozen on the cookie sheet and bake at 450°F for about 20 minutes.