Well it is the middle of winter here and Chloe made this over last summer but mommy didn't get a chance to post it. So Chloe thought it should be posted to warm up a cold winter day.

Bead Wind Mobile (Spinner)

Here is what you will need:
Bags of beads (you can get a bag of different colors at the dollar store)
Old mini muffin tin and 8" or 9" pie plate/pan or any shape pan (Chloe's mommy got both of ours at the ARC thrift store)
That's it!

Chloe and mommy used egg crates to separate the colors, it looks like a rainbow!


Looks like Chloe is ready to go. Mommy placed the pans on the cookie sheet so if any beads were dropped they would fall on the cookie sheet and be easy to get.
Here we go!


Chloe wanted to work on the mini muffin tin first. We placed the beads in hole side up filling the bottom of the tin. Some with just different colors other in a flower pattern. They turned out very cute.


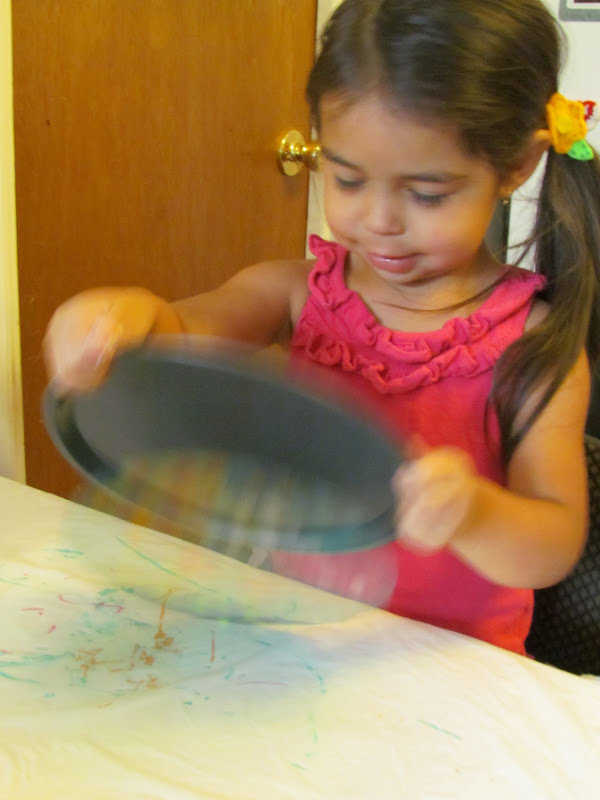
Now Chloe works on her plate, she puts all kinds of pretty colors down.


Mommy made some flowers and a bright sunny sky. Now they are ready for the oven.

Time to bake.
Bake at 400f for around 25 minutes.
Mommy stayed right by the oven keeping an eye on them, she took a quick peek in the oven to see how they are doing and it looks like they are about halfway there.
TIP: Chloe's mommy would recommend closing off the other doors in the house and opening the doors in the general area to let the plastic smell get out. Chloe also stayed in her room till mommy called her out that they were done.


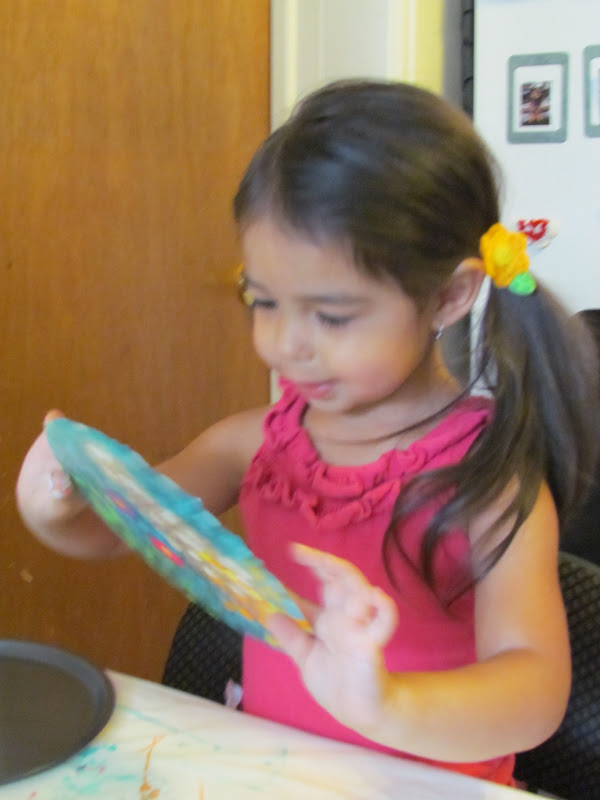
Here they are all done and cooled! How cool is this!

Chloe couldn't wait to see how they turned!


It was great they just popped right out!

Chloe thought the little baby flowers were so pretty.


Here goes nothing! Very cool, Chloe looked looking through it.

Now to take out mommy's, her turned out pretty as well.

She just loved looking into the light to see the colors.


She couldn't stop playing with them and looking at the patterns.


Here they are all ready for holes and hanging up.


Mommy drilled holes at the top and bottom of the big ones and one in the little ones.


Ribbon time cut different lengths and tie on the little ones.

Tie to the big one and it is ready to put out!
There you have it! Chloe thinks it turned out super!
Hope you will all try this fun easy craft out yourselves.
That's very cute and an inexpensive decoration to make for gifts. Good job Chloe
ReplyDeleteThe price is what makes it so great! What a great idea to make it as a gift for one of her friends. Thank you so much for taking the time to comment. Chloe gets very happy when mommy shows her she has a comment.
ReplyDeleteLove this craft! We will definitely have to try it! Good job Chloe!
ReplyDeleteSo glad to hear that! It was a lot of fun for mommy as well. haha I will show her the comment in the morning. Thank you for stopping by!
ReplyDeletechloe ; what a wonderful, inexpensive little beautiful gift; I plan to make several of these little spinners for friends and family, thank you so much...keep up the great work.
ReplyDelete