Friday, February 22, 2013

High Altitude Deep Dish Brownies

Living in Colorado can sometimes make a normal recipe come out not so good. That was the case when Chloe and her mommy made some brownies from scratch it was not good.
So we went on a hunt for a high altitude brownie recipe and we found one that looked like a winner. We found it at Allrecipes.com <---this is the link to it.

So here we go lets see how it turns out!

High Altitude Deep Dish Brownies

Little Chloe Cooks

++++++++++++++++++++++++++++++++++++++++++++++++++++


Looks like Chloe has already got a head start on the recipe! Go Chloe go. While she mixes I will let you know the ingredients you will need.


In the blue bowl: all-purpose flour , unsweetened cocoa powder, instant coffee, baking powder, and salt. Mommy did this ahead of time= In a large bowl, combine the flour, cocoa, baking powder and salt; set aside.

Then we have in front vanilla extract, white sugar, eggs, and butter. Chopped walnuts (not shown)

Now we are ready to make some yumminess!
Preheat the oven to 350 degrees F (175 degrees C). Grease an 8 inch square baking dish. Mommy didn't have a 8 inch pan so she used a 7X11 which worked out just fine.


In a separate bowl, stir together the melted butter, sugar, and vanilla.


Mix in the eggs.


Chloe was having so much mixing she didn't want to stop.


Gradually stir in the dry ingredients just until blended. 


Chloe was so surprised to see how it turned into chocolate mix. Yumminess is near!


Fold in walnuts if using.


Ready for the oven!

Bake in the preheated oven until the edges start to pull away from the sides of the pan and the top appears dry, 35 to 40 minutes.
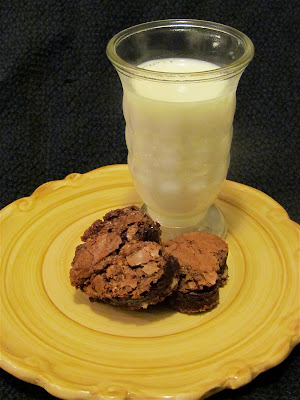
High Altitude Deep Dish Brownies

Oh they look so yummy!


Ok now for the true test.....


I do believe that is the face of yumminess!!

 We hope all of our Colorado friends will give this recipe a try, oh and mommy did read that people at a lower altitude tried this recipe and it worked for them as well!

+++++++++++++++++++++++++++++++++++++++++++++

High Altitude Deep Dish Brownies

7/8 cup (7/8 cup is 1 cup minus 2 Tbsp.) all-purpose flour 
1/2 cup unsweetened cocoa powder
1/2 tsp. baking powder
1/2 tsp. instant coffee (optional) we added this, it brings out the chocolate flavor
1/2 tsp. salt
3/4 cup butter, melted
1 1/2 cups white sugar
1 1/2 tsp. vanilla extract
3 eggs
1/2 cup chopped walnuts (optional)

Preheat the oven to 350 degrees F. Grease an 8 inch square baking dish.

In a large bowl, combine the flour, cocoa, baking powder and salt; set aside. In a separate bowl, stir together the melted butter, sugar, and vanilla. Mix in the eggs. Gradually stir in the dry ingredients just until blended. Fold in walnuts if using. Spread the batter evenly in the prepared pan.

Bake in the preheated oven until the edges start to pull away from the sides of the pan and the top appears dry, 35 to 40 minutes.

Wednesday, February 6, 2013

Valentine's Day Recycle Crayon Crafts

Valentine's Day is almost here and Chloe has two more crafts to show you. Both of these crafts are made with crayons that are broken or the ones you get from a restaurant. It is so nice to reuse something that might have been thrown away.

Wax Paper Crayon HeartsMelted Crayon Hearts 

  Wax Paper crayon Hearts      Melted Crayon Hearts       

The first craft (wax paper and crayon hearts) came from a site that I think is so great called The Artful Parent. There are so many fun craft ideas to do with your children, so Chloe thinks if you have a chance go check it out.

The second craft is (Melted Crayon Hearts) which Chloe's mommy has been saving all of Chloe's broken/restaurant crayons to melt into new cool mixed color crayons.


First Chloe needs to get the crayons ready. She has to take off all the paper from the crayons. Mommy took a blade and cut down the paper on the crayon before so it was easier for Chloe to take off.

Wax Paper crayon Hearts


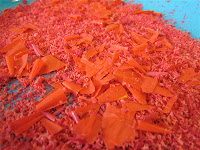
For the first craft Chloe uses a pencil sharpener to make shavings of all the Valentine colored crayons. Her mommy also used her kitchen microplane grater to help get the job done.


So many pretty colors! This took some time and if you live where it is dry WATCH OUT! they fly everywhere if you are not careful LOL, but so worth it.


Ok we are ready to get to the fun part. Now Chloe picks out the color the wants to start with and sprinkles it on a sheet of wax paper, then another color and so on till we have a beautiful mix of colors. Then we put another sheet of wax paper on top.


Now mommy takes it over to the ironing board which she has covered with an old stained t-shirt (so any wax or crayon that might seep out goes on the t-shirt) and places the wax paper on top, then another old t-shirt on top. 
With the iron set on low she irons all over the top to melt  the crayon shavings between the wax paper pieces.


WOW! Look how they turned out, pretty neat. Ok time to cut out our hearts.


Great work Chloe! Mommy traced different sized hearts and Chloe and mommy cut them out. Then punched out small holes at the top of the hearts and tied ribbon to each heart. 


Mommy used a paper towel roll covered in red construction paper and ribbon strung through it and tied.
This turned out so cute and Chloe said, "Oh mommy it looks so beautiful".
Now on to the next crayon craft!!

Melted Crayon Hearts


Here we go!
First Chloe takes all the crayons pieces and puts all the same colors together, then she fills the silicone heart pan with the crayons making different combinations of colors. There you have it so easy and ready for the oven.

Preheat your oven to 200, cook for around 15 to 20 minutes making sure to keep an eye on them. When all the crayon are melted down remove from oven and let cool completely. 


There you have it all cooled down. Chloe's mommy put the pan in the freezer to cool quickly because Chloe was to excited to wait for them to cool on the counter.


Just pop them out and see how the colors turned out. Chloe has Valentine's Day, sunset, ocean, forest, camo, and black colors.


She couldn't wait to try them out. Mommy couldn't either.


It is so much fun coloring with these and seeing what color it will change to next.

Chloe hopes you will enjoy these recycled crayon crafts with your family and comment on how they turned out for you.

Hope you have a wonderful day.